Wallpaper Removal: The Process Explained
Wallpaper Removal: The Process Explained
When homeowners decide to change their décor from outdated wallpaper to a fresh, modern paint design, a major question is how to remove the wallpaper in the first place. Grabbing a loose corner and pulling it with all your might just won’t be enough to get the job done. Walls can even become damaged if frustration gets the best of you or improper techniques are used. However, doing it the right way is still a sticky, hot mess. Fortunately, there are professionals who are used to removing wall paper and can get the job done for you without all the hassle and frustration. Below are the steps to remove wallpaper the right way and a few reasons why you might reconsider doing this job yourself.
Step One: Prepare the Area
Much like painting, the area around where you are working should be completely protected. A good place to start is by moving furniture away from walls and laying down plastic sheet starting from the baseboards. Taping the plastic to the baseboard with quality tape is important, since lots of water will be needed to get the wallpaper off and a cheap tape or tape that wasn’t stuck on properly will simply peel away as soon as water hits it. It is also a good idea to lay down some towels over the plastic, just to help avoid water running off the plastic and onto your floors.
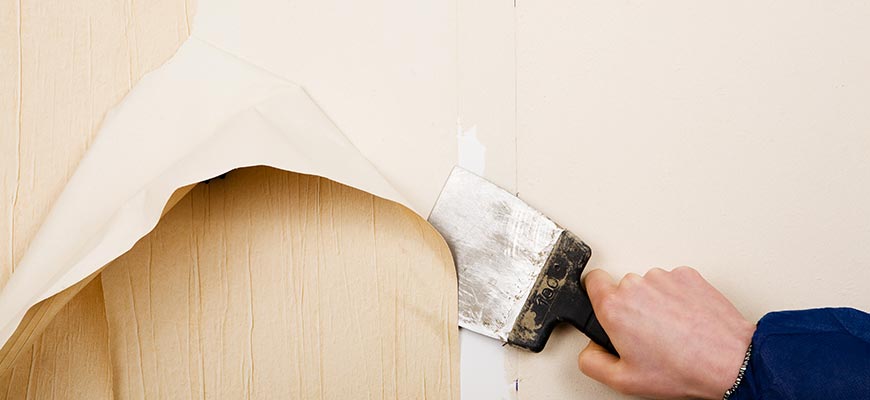
Step Two: Peel Off The Wall Paper
You can use a wallpaper removal mixture that can be bought from any store and a putty knife. The putty knife can help loosen the wallpaper at the corners or around light switches and wall plugs. It is important that the putty knife is used carefully to loosen the wallpaper so that the wall underneath doesn’t get carved into or damaged. Once a corner is loose, pulling the paper of in pieces can be achieved. Of course, not everything will come off in one go and there will be wallpaper paste left behind. That is dealt with in the next step.
Step Three: Remove the Remaining Paper and Paste
If you are doing this yourself, keep applying the wallpaper removal mixture. Grab a sponge and soak the wallpaper with it. A sponge mop can be used to reach higher places. After allowing the wallpaper to absorb the mixture, the paste will start to let go of the remaining pieces of wall paper so that you can get them off with a scraper. However, some wallpaper is extremely stubborn and the mixture will take a great deal of time to remove the wall paper effectively. Also, drywall can be damaged by the excessive use of water so it is critical that water isn’t soaking on the wall for hours on end. Work in small sections. Professionals often have steam machines or special chemical mixes that make the wallpaper come off much easier and much faster than you can do on your own.
Step Four: Remove the Remaining Wallpaper Paste
Lastly, the wallpaper paste needs to come off before you can start moving on with a new paintjob. To get the paste off, a paste remover is often necessary because aggressive scraping with a putty knife will certainly cause damage that can be costly to repair. Apply the remover to the areas that are still sticky and wait a few minutes. Once the paste is softened up by the remover, you can start to scrape it off safely with a putty knife. Homeowners tend to skip this last step since the wall can look clean enough for paint once all of the paper has been removed. However, new paint jobs are guaranteed to crack or flake if the paste is left behind.
Although there are only four steps, removing wallpaper is not an easy task, both physically and psychologically. It could extend beyond what you had planned as a weekend activity. There is a great deal of scraping and reaching and the amount of time it takes to get a small area done is frustrating and discouraging. To make matters worse, many homeowners actually destroy a wall by trying to move to quickly or by allowing liquids to soak in for too long. After watching a professional remove the wallpaper so much more efficiently and without damaging your home, struggling to do the job on your own is simply not worth it.
Once your wallpaper is removed, the process isn’t done. You’ll need to get your walls prepped before painting to ensure you accidentally don’t paint over any missed wallpaper paste. If you don’t prep and seal your walls before painting, it may cause several costly problems in the future which are completely avoidable.
If you have any questions or would like to get a free estimate, contact us here or call us directly at 239.600.1418.
Before & After Photos
See before and after pictures of our work located in our photo gallery.
See Our Work HereServices We Offer
- Exterior Painting
- Interior Painting
- Cabinet Painting
- Popcorn Ceiling Removal
- Pressure Washing
- Skim Coating
- Surface Preparation
- Wallpaper Removal
- Damage Repair

Web Design & SEO by DE Web Designs